Stage 3

Stage 3 Overview

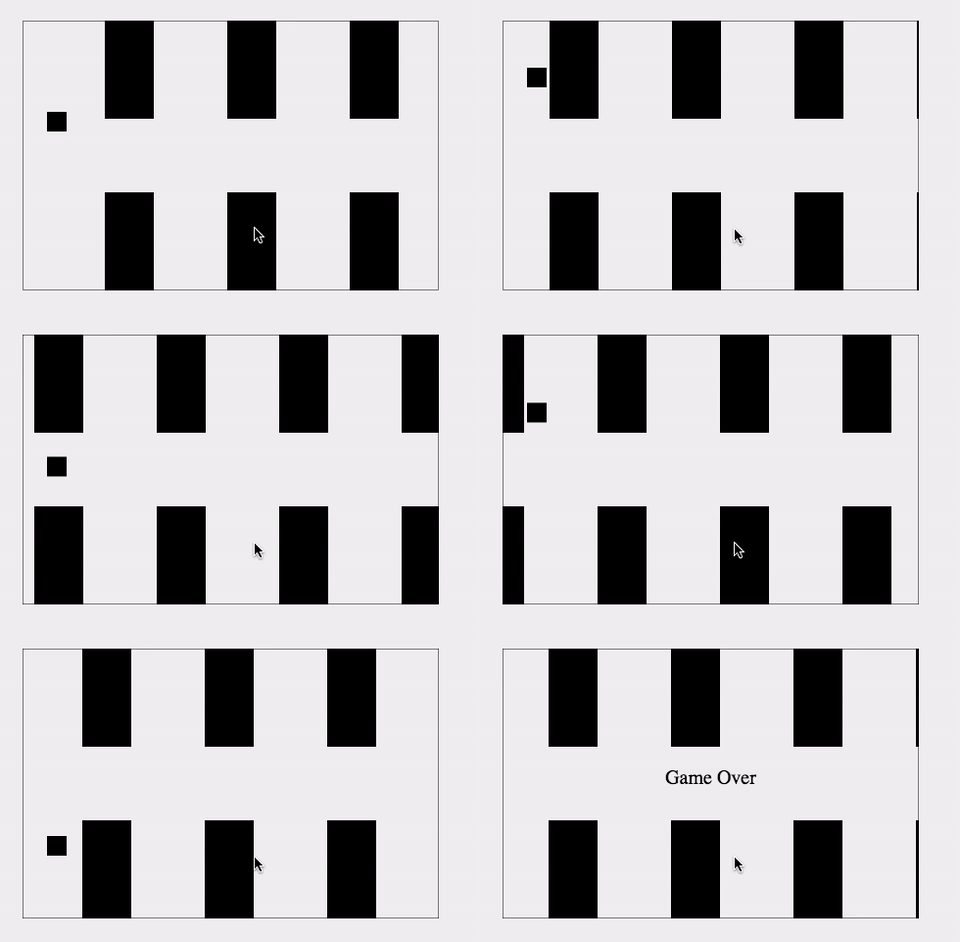
In this stage we'll make our flappy bird fly!

We're going to explore event listeners, which will allow us to listen for a click on the canvas and make our flappy bird fly a bit before falling back down.

Then, if the bird falls outside of the game area we'll end the game.

Lastly we'll create a simple moving background that the flappy square can fly through. We won't yet check to see if the flappy square runs into any walls, we'll just create them to provide the illusion of movement.

Overview
 

Lesson: Responding To Events

In Stage 2 we caught a glimpse of event listeners in the code we provided you that starts and pauses the animations when the canvas receives or loses focus (the 'focus' and 'blur' events).

In this example we'll and an event listener that listens for mouse clicks and we'll move our square to where ever we click.

We can listen for clicks on the canvas using code like this:

canvas.addEventListener('click', handleClick);

Click around on the canvas and watch how the square jumps to each mouse click.

Quick Reference: Event Listeners fillRect() Coordinates

Editor (write code below)
var canvas = document.getElementById('flappy_square_stage3_lesson1'); var context = canvas.getContext('2d'); function drawSquare(x, y) { context.fillRect(x - 20, y - 20, 40, 40); } function reset() { context.clearRect(0, 0, canvas.width, canvas.height); context.font = "20px serif"; context.textAlign = 'center'; context.fillText('Click anywhere on the canvas to move the square.', canvas.width / 2, 50); } function handleClick(e) { reset(); drawSquare(e.layerX, e.layerY); } canvas.addEventListener('click', handleClick); reset(); drawSquare(100, 100);
Message Log
This is a lesson, not a challenge, the code runs automatically.

But change it! Play with it! Click "Run" to see your changes.

Run
Run and Focus Canvas
Reset
Canvas (your drawing will display here)

Challenge 1

Challenge1example
Challenge 1 Sample Solution

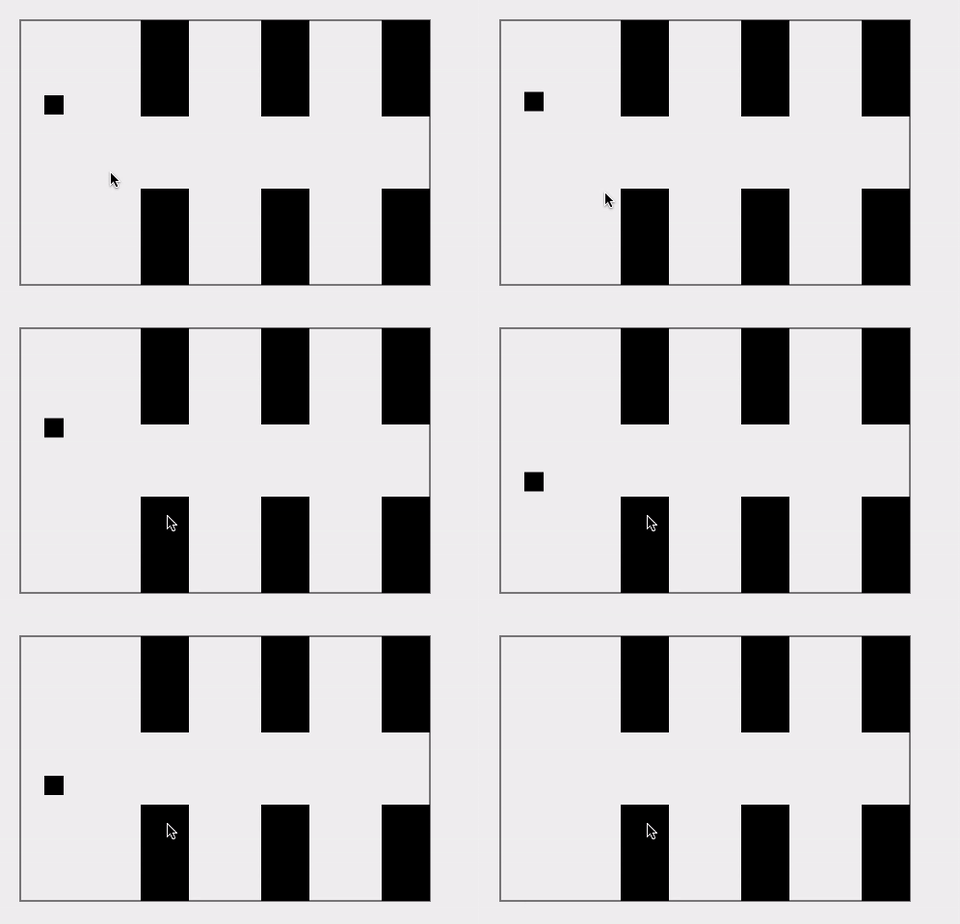
Take your code from Stage 2 and make your flappy square fly.

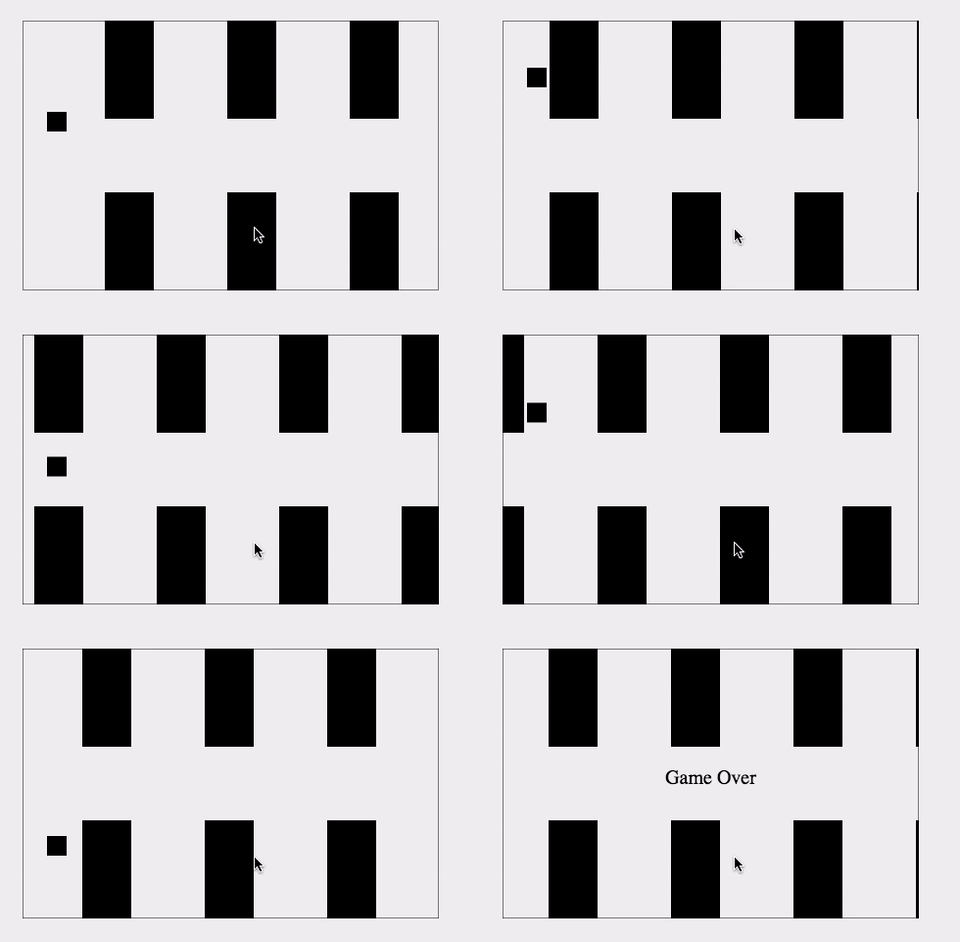
Listen for a click event on the canvas. When a click is received set the "square.yVelocity" to the "square.jump" variable. And let's set the "square.jump" variable to -8 (remember the y axis of the canvas gets larger as it goes down). This will cause the flappy square to jump up before being pulled back down by gravity.

We'll also slow down the framerate so that you have more time to click on the canvas before the square falls off the canvas. For now let's set it to draw one frame every 80 miliseconds (this will be slow, but it will be a better framerate for testing).

In the end your flappy square should behave like the example provided to the right.

Quick Reference: Event Listeners

Previous Challenge: View your code from Stage 2 Challenge 6 to use on this challenge.

Code Missing: You have not yet entered any code in to the previous challenge: Stage 2 Challenge 6
Stage 2 Challenge 6
Editor (write code below)
var canvas = document.getElementById('flappy_square_stage1_challenge1'); var context = canvas.getContext('2d'); var interval; var gravity = ; // HASH VARIABLES HERE // Remember to store "yVelocity" in // your square hash variable function drawBoundary() { } function drawSquare() { } function drawWall(x) { } function drawWalls() { } function flap() { // CODE FOR ONE "FLAP" } function adjustPosition() { } function programSteps() { } function runProgram() { interval = } // CODE TO CALL flap METHOD WHEN CANVAS IS CLICKED // The following code is provided for you. // It creates an eventListener that listens // for the canvas to come into "focus", which // happens when you click on it. // This allows us to stop and start each individual // animation on this whole page separately. function startAnimation() { runProgram(); } function pauseAnimation() { clearInterval(interval); } canvas.addEventListener('focus', startAnimation); canvas.addEventListener('blur', pauseAnimation); canvas.focus();
Message Log
This is a lesson, not a challenge, the code runs automatically.

But change it! Play with it! Click "Run" to see your changes.

Run
Run and Focus Canvas
Reset
Canvas (your drawing will display here)

A Solution: Here's the code I wrote to complete this challenge. View One Possible Solution

var canvas = document.getElementById('flappy_square_stage3_challenge1'); var context = canvas.getContext('2d'); var interval; var gravity = 0.5; var boundary = { minX: 25, minY: 25, width: 425, height: 275 }; var square = { x: 25, y: 75, size: 20, yVelocity: 0, jump: -8 }; var wall = { width: 50, height: 100 }; function drawBoundary() { context.strokeRect(0, 0, boundary.width, boundary.height); } function drawSquare() { context.fillRect(square.x, square.y, square.size, square.size); } function drawWall(x) { context.fillRect(x, 0, wall.width, wall.height); context.fillRect(x, boundary.height - wall.height, wall.width, wall.height); } function drawWalls() { drawWall(125); drawWall(125 * 2); drawWall(125 * 3); } function flap() { square.yVelocity = square.jump; } function adjustPosition() { square.yVelocity += gravity; square.y += square.yVelocity; } function programSteps() { context.clearRect(0, 0, canvas.width, canvas.height); adjustPosition(); context.save(); context.translate(boundary.minX, boundary.minY); drawBoundary(); drawSquare(); drawWalls(); context.restore(); } function runProgram() { interval = setInterval(programSteps, 80); } canvas.addEventListener('click', flap); // The following code is provided for you. // It creates an eventListener that listens // for the canvas to come into "focus", which // happens when you click on it. // This allows us to stop and start each individual // animation on this whole page separately. function startAnimation() { runProgram(); } function pauseAnimation() { clearInterval(interval); } canvas.addEventListener('focus', startAnimation); canvas.addEventListener('blur', pauseAnimation); canvas.focus();
 

Lesson: Monitoring Game State

In any game your code will need to be constantly monitoring the environment, calculating whether different objects are colliding or staying in bounds, etc.

In our game one thing we need to monitor for is whether the flappy square falls off the screen.

In this example we demonstrate a game area. If you mouse over the canvas it will note when you are inside our outside the game area.

The code below checks to see if the mouse is inside our outside the game area:

if (x > boundary.minX && x < boundary.maxX && y > boundary.minY && y < boundary.maxY) {
  inOut = 'inside the game area.';
} else {
  inOut = 'outside the game area.';
}

Quick Reference: Event Listeners

Editor (write code below)
var canvas = document.getElementById('flappy_square_stage3_lesson2'); var context = canvas.getContext('2d'); var boundary = { minX: 50, maxX: 400, minY: 50, maxY: 300 }; function drawBoundary() { context.lineWidth = 2; context.beginPath(); context.moveTo(boundary.minX, boundary.minY); context.lineTo(boundary.minX, boundary.maxY); context.lineTo(boundary.maxX, boundary.maxY); context.lineTo(boundary.maxX, boundary.minY); context.closePath(); context.stroke(); } function handleMouseMove(e) { context.clearRect(0, 0, canvas.width, canvas.height); drawBoundary(); var x = e.layerX; var y = e.layerY; var inOut; if (x > boundary.minX && x < boundary.maxX && y > boundary.minY && y < boundary.maxY) { inOut = 'inside the game area.'; } else { inOut = 'outside the game area.'; } context.fillText('Your mouse is: ' + inOut, boundary.minX, 40); } canvas.addEventListener('mousemove', handleMouseMove); context.font = "20px serif"; context.fillText('Mouse over the canvas.', boundary.minX, 40); drawBoundary();
Message Log
This is a lesson, not a challenge, the code runs automatically.

But change it! Play with it! Click "Run" to see your changes.

Run
Run and Focus Canvas
Reset
Canvas (your drawing will display here)

Challenge 2

Challenge2example
Challenge 2 Sample Solution

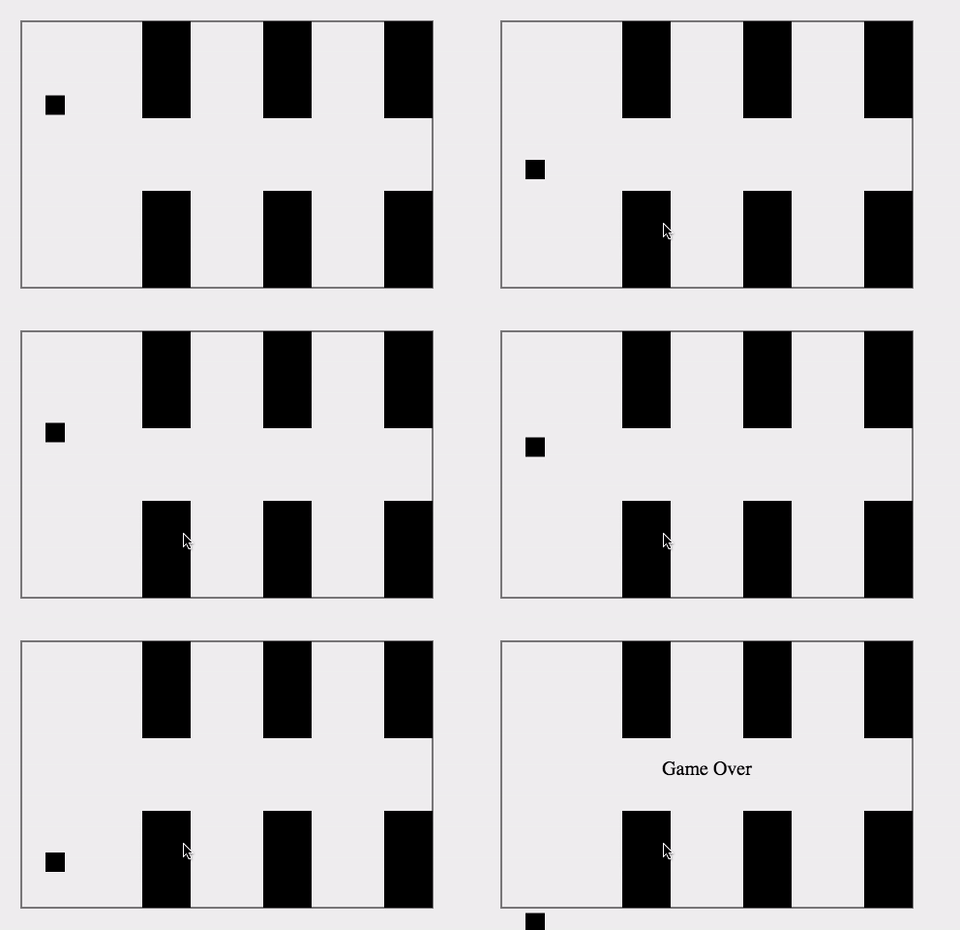
Let's take the code from Challenge 1 and check to make sure our flappy square hasn't fallen below the boundary.

When the flappy square goes above the maximum y value for the boundary (remember y values are larger at the bottom of the canvas) we'll stop the game and display a message.

We've provided the code to stop the game and display the message. You need to call the method and determine when the game should be ended in your checkBoundary() function.

In the end your flappy square should behave like the example provided to the right.

Quick Reference: Event Listeners

Previous Challenge: View your code from Stage 3 Challenge 1 to use on this challenge.

Code Missing: You have not yet entered any code in to the previous challenge: Stage 3 Challenge 1
Stage 3 Challenge 1
Editor (write code below)
var canvas = document.getElementById('flappy_square_stage3_challenge2'); var context = canvas.getContext('2d'); var interval; var gravity = ; // HASH VARIABLES HERE function drawBoundary() { } function drawSquare() { } function drawWall(x) { } function drawWalls() { } function flap() { } function adjustPosition() { } function checkBoundary() { // CODE TO CHECK WHETHER FLAPPY SQUARE // IS ABOVE BOUNDARY FLOOR HERE. if () { endGame(); } } function endGame() { context.font = "20px serif"; context.textAlign = 'center'; var xCenter = boundary.width / 2; var yCenter = boundary.height / 2; context.fillText('Game Over', xCenter, yCenter); pauseAnimation(); } function programSteps() { } function runProgram() { interval = } canvas.addEventListener('click', flap); // The following code is provided for you. // It creates an eventListener that listens // for the canvas to come into "focus", which // happens when you click on it. // This allows us to stop and start each individual // animation on this whole page separately. function startAnimation() { runProgram(); } function pauseAnimation() { clearInterval(interval); } canvas.addEventListener('focus', startAnimation); canvas.addEventListener('blur', pauseAnimation); canvas.focus();
Message Log
This is a lesson, not a challenge, the code runs automatically.

But change it! Play with it! Click "Run" to see your changes.

Run
Run and Focus Canvas
Reset
Canvas (your drawing will display here)

A Solution: Here's the code I wrote to complete this challenge. View One Possible Solution

var canvas = document.getElementById('flappy_square_stage3_challenge2'); var context = canvas.getContext('2d'); var interval; var gravity = 0.5; var boundary = { minX: 25, minY: 25, width: 425, height: 275 }; var square = { x: 25, y: 75, size: 20, yVelocity: 0, jump: -8 }; var wall = { width: 50, height: 100 }; function drawBoundary() { context.strokeRect(0, 0, boundary.width, boundary.height); } function drawSquare() { context.fillRect(square.x, square.y, square.size, square.size); } function drawWall(x) { context.fillRect(x, 0, wall.width, wall.height); context.fillRect(x, boundary.height - wall.height, wall.width, wall.height); } function drawWalls() { drawWall(125); drawWall(125 * 2); drawWall(125 * 3); } function flap() { square.yVelocity = square.jump; } function adjustPosition() { square.yVelocity += gravity; square.y += square.yVelocity; } function checkBoundary() { if (square.y >= boundary.height) { endGame(); } } function endGame() { context.font = "20px serif"; context.textAlign = 'center'; var xCenter = boundary.width / 2; var yCenter = boundary.height / 2; context.fillText('Game Over', xCenter, yCenter); pauseAnimation(); } function programSteps() { context.clearRect(0, 0, canvas.width, canvas.height); adjustPosition(); context.save(); context.translate(boundary.minX, boundary.minY); drawBoundary(); drawSquare(); drawWalls(); checkBoundary(); context.restore(); } function runProgram() { interval = setInterval(programSteps, 80); } canvas.addEventListener('click', flap); // The following code is provided for you. // It creates an eventListener that listens // for the canvas to come into "focus", which // happens when you click on it. // This allows us to stop and start each individual // animation on this whole page separately. function startAnimation() { runProgram(); } function pauseAnimation() { clearInterval(interval); } canvas.addEventListener('focus', startAnimation); canvas.addEventListener('blur', pauseAnimation); canvas.focus();
 

Lesson: Scrolling Objects

In our game our walls will move to the left while our flappy square stays in the same "x" position, giving the illusion that our flappy square is flying through the walls even though it is not changing its "x" coordinate.

In this example we'll demonstrate a background that moves to the left while a red ball stays stationary, giving the impression that the ball is rolling through the background.

We'll use a variable, distance, to track the position of the background, adjusting the position of each tree drawn by 'distance'. Each frame adjusts 'distance' by 2 pixels, causing each tree to be drawn 2 pixels to the left.

Then we can adjust the drawing of our trees by "distance". In this example we only have four trees so we can just manually adjust the starting "x" coordinate of each one by "distance", but in the future we'll do this algorithmically.

function drawTrees() {
  drawTree(75 - distance);
  drawTree(150 - distance);
  drawTree(225 - distance);
  drawTree(300 - distance);
  drawTree(375 - distance);
  drawTree(450 - distance);
}

When we run the animation fast enough it creates the illusion of the trees moving slowly, which in turn creates the illusion of the ball moving because in real life backgrounds don't move.

Quick Reference: fillRect() Coordinates setInterval()

Editor (write code below)
var canvas = document.getElementById('flappy_square_stage3_lesson3'); var context = canvas.getContext('2d'); var interval; var distance = 0; var road = { height: 40 }; function drawRoad() { context.save(); context.fillStyle = '#cccccc'; var roadY = canvas.height - road.height; context.fillRect(0, roadY, canvas.width, road.height); context.restore(); } function drawGrass() { context.save(); context.fillStyle = '#238d23'; var grassHeight = 6; var grassY = canvas.height - road.height - grassHeight; context.fillRect(0, grassY, canvas.width, grassHeight); context.restore(); } function drawTrees() { drawTree(75 - distance); drawTree(150 - distance); drawTree(225 - distance); drawTree(300 - distance); drawTree(375 - distance); drawTree(450 - distance); } function drawTree(centerX) { var bottomY = canvas.height - road.height; context.save(); context.translate(centerX, bottomY); context.fillStyle = '#a5681c'; context.fillRect(0, -60, 12, 60); context.beginPath(); context.arc(6, -60, 32, 0, Math.PI*2, true); context.closePath(); context.fillStyle = '#238d23'; context.fill(); context.restore(); } function drawBall() { var ballRadius = 15; context.save(); context.translate(50, canvas.height - (road.height/2) - ballRadius); context.beginPath(); context.arc(0, 0, ballRadius, 0, Math.PI*2, true); context.closePath(); context.fillStyle = 'red'; context.fill(); context.restore(); } function adjustPosition() { distance += 2; } function programSteps() { context.clearRect(0, 0, canvas.width, canvas.height); adjustPosition(); drawRoad(); drawTrees(); drawGrass(); drawBall(); } function runProgram() { interval = setInterval(programSteps, 50); } // The following code is provided for you. // It creates an eventListener that listens // for the canvas to come into "focus", which // happens when you click on it. // This allows us to stop and start each individual // animation on this whole page separately. function startAnimation() { runProgram(); } function pauseAnimation() { clearInterval(interval); context.font = "20px serif"; context.textAlign = 'center'; context.fillText('Click anywhere on the canvas to start the animation.', canvas.width / 2, 50); } canvas.addEventListener('focus', startAnimation); canvas.addEventListener('blur', pauseAnimation); pauseAnimation();
Message Log
This is a lesson, not a challenge, the code runs automatically.

But change it! Play with it! Click "Run" to see your changes.

Run
Run and Focus Canvas
Reset
Canvas (your drawing will display here)

Challenge 3

Challenge3example
Challenge 3 Sample Solution

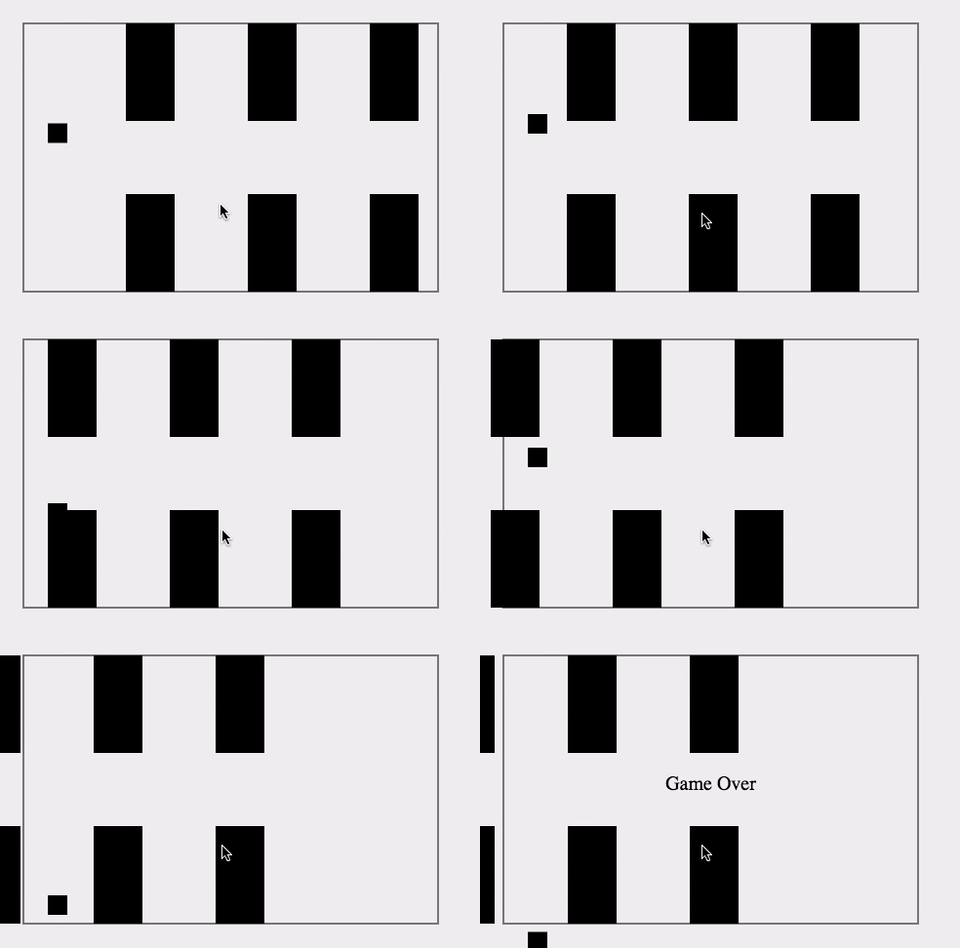
Ok, now we're going to try and make our walls move, creating the illusion that our flappy square is flying through the holes.

While this may sound easy, it's one of the more complicated parts of the game. The lesson above provides an example of how we want to do this.

Basically we'll create a variable "distance" and we'll use that to track how far our flappy square has progressed and therefore how far to the left our walls should be shifted.

In each frame advance "distance" by 2 (add 2) and use that to shift all walls to the left.

Since we only have three trees so far we can simply adjust the "x" coordinate of each one by "distance" in each frame.

In the end your flappy square should behave like the example provided to the right.

Quick Reference: fillRect() Coordinates setInterval()

Previous Challenge: View your code from Stage 3 Challenge 2 to use on this challenge.

Code Missing: You have not yet entered any code in to the previous challenge: Stage 3 Challenge 2
Stage 3 Challenge 2
Editor (write code below)
var canvas = document.getElementById('flappy_square_stage3_challenge3'); var context = canvas.getContext('2d'); var interval; var gravity = ; var distance = ; // HASH VARIABLES HERE function drawBoundary() { } function drawSquare() { } function drawWall(x) { } function drawWalls() { // Remember to adjust the "x" // coordinate of each wall by // "distance" here. } function flap() { } function adjustPosition() { // Let's adjust our "distance" // variable here. } function checkBoundary() { } function endGame() { context.font = "20px serif"; context.textAlign = 'center'; var xCenter = boundary.width / 2; var yCenter = boundary.height / 2; context.fillText('Game Over', xCenter, yCenter); pauseAnimation(); } function programSteps() { } function runProgram() { interval = } canvas.addEventListener('click', flap); // The following code is provided for you. // It creates an eventListener that listens // for the canvas to come into "focus", which // happens when you click on it. // This allows us to stop and start each individual // animation on this whole page separately. function startAnimation() { runProgram(); } function pauseAnimation() { clearInterval(interval); } canvas.addEventListener('focus', startAnimation); canvas.addEventListener('blur', pauseAnimation); canvas.focus();
Message Log
This is a lesson, not a challenge, the code runs automatically.

But change it! Play with it! Click "Run" to see your changes.

Run
Run and Focus Canvas
Reset
Canvas (your drawing will display here)

A Solution: Here's the code I wrote to complete this challenge. View One Possible Solution

var canvas = document.getElementById('flappy_square_stage3_challenge3'); var context = canvas.getContext('2d'); var interval; var gravity = 0.5; var distance = 0; var boundary = { minX: 25, minY: 25, width: 425, height: 275 }; var square = { x: 25, y: 75, size: 20, yVelocity: 0, jump: -8 }; var wall = { width: 50, height: 100 }; function drawBoundary() { context.strokeRect(0, 0, boundary.width, boundary.height); } function drawSquare() { context.fillRect(square.x, square.y, square.size, square.size); } function drawWall(x) { context.fillRect(x, 0, wall.width, wall.height); context.fillRect(x, boundary.height - wall.height, wall.width, wall.height); } function drawWalls() { drawWall(125 - distance); drawWall((125 * 2) - distance); drawWall((125 * 3) - distance); } function flap() { square.yVelocity = square.jump; } function adjustPosition() { distance += 2; square.yVelocity += gravity; square.y += square.yVelocity; } function checkBoundary() { if (square.y >= boundary.height) { endGame(); } } function endGame() { context.font = "20px serif"; context.textAlign = 'center'; var xCenter = boundary.width / 2; var yCenter = boundary.height / 2; context.fillText('Game Over', xCenter, yCenter); pauseAnimation(); } function programSteps() { context.clearRect(0, 0, canvas.width, canvas.height); adjustPosition(); context.save(); context.translate(boundary.minX, boundary.minY); drawBoundary(); drawSquare(); drawWalls(); checkBoundary(); context.restore(); } function runProgram() { interval = setInterval(programSteps, 80); } canvas.addEventListener('click', flap); // The following code is provided for you. // It creates an eventListener that listens // for the canvas to come into "focus", which // happens when you click on it. // This allows us to stop and start each individual // animation on this whole page separately. function startAnimation() { runProgram(); } function pauseAnimation() { clearInterval(interval); } canvas.addEventListener('focus', startAnimation); canvas.addEventListener('blur', pauseAnimation); canvas.focus();
 

Lesson: Algorithmic Creation

We currently have three scrolling walls in our game and the previous example showed four scrolling trees. In both situations, though, we need essentially infinite walls or trees so that they continue to come as the scrolling progresses.

This means that rather than explicitly writing code that draws these walls, which would take forever, we need to write code that itself determines where the walls should go.

In this example we show a series of trees which serves as a background. We could call our drawTree() method explicitly like this:

drawTree(75 - distance);
drawTree(150 - distance);
drawTree(225 - distance);
drawTree(300 - distance);
drawTree(375 - distance);
drawTree(450 - distance);
drawTree(525 - distance);
drawTree(600 - distance);
... etc, etc ...

Or we could draw trees algorithmically, drawing them every 75 pixels until the end of the canvas is reached. This would look like:

var trees {
  spacing: 75
}

function drawTrees() {
  var treeX = distance - trees.spacing;
  while (treeX < canvas.width + distance + tree.spacing) {
    if (treeX % trees.spacing === 0) {
      drawTree(treeX - distance);
    }
    treeX += 1;
  }
}

This code starts at treeX = distance - trees.spacing (we subtract trees.spacing so that trees do not disappear when they hit the border) and loops over and over across the canvas, looking for spots on the canvas that, when adjust by distance, are divisible by 75 (trees.spacing). This creates the effect of trees scrolling across the canvas.

Note: we also end our loop at canvas.width + distance + tree.spacing to ensure that trees are not generated on the canvas, but rather one tree is generated off the canvas and scrolls on to the canvas.

Check out the lesson on while loops to better understand how these loops work.

Quick Reference: While Loops fillRect() Coordinates

Editor (write code below)
var canvas = document.getElementById('flappy_square_stage3_lesson4'); var context = canvas.getContext('2d'); var interval; var distance = 0; var road = { height: 30 }; var tree = { width: 64, spacing: 75 }; function drawRoad() { context.save(); context.fillStyle = '#cccccc'; var roadY = canvas.height - road.height; context.fillRect(0, roadY, canvas.width, road.height); context.restore(); } function drawGrass() { context.save(); context.fillStyle = '#238d23'; var grassHeight = 6; var grassY = canvas.height - road.height - grassHeight; context.fillRect(0, grassY, canvas.width, grassHeight); context.restore(); } function drawTrees() { var treeX = distance - tree.width; while (treeX < canvas.width + distance + tree.width) { if (treeX % tree.spacing === 0) { drawTree(treeX - distance); } treeX += 1; } } function drawTree(centerX) { var bottomY = canvas.height - road.height; context.save(); context.translate(centerX, bottomY); context.fillStyle = '#a5681c'; context.fillRect(0, -60, 12, 60); context.beginPath(); context.arc(6, -60, tree.width / 2, 0, Math.PI*2, true); context.closePath(); context.fillStyle = '#238d23'; context.fill(); context.restore(); } function drawBall() { var ballRadius = 15; context.save(); context.translate(50, canvas.height - (road.height/2) - ballRadius); context.beginPath(); context.arc(0, 0, ballRadius, 0, Math.PI*2, true); context.closePath(); context.fillStyle = 'red'; context.fill(); context.restore(); } function adjustPosition() { distance += 2; } function programSteps() { context.clearRect(0, 0, canvas.width, canvas.height); adjustPosition(); drawRoad(); drawTrees(); drawGrass(); drawBall(); } function runProgram() { interval = setInterval(programSteps, 50); } // The following code is provided for you. // It creates an eventListener that listens // for the canvas to come into "focus", which // happens when you click on it. // This allows us to stop and start each individual // animation on this whole page separately. function startAnimation() { runProgram(); } function pauseAnimation() { clearInterval(interval); context.font = "20px serif"; context.textAlign = 'center'; context.fillText('Click anywhere on the canvas to start the animation.', canvas.width / 2, 50); } canvas.addEventListener('focus', startAnimation); canvas.addEventListener('blur', pauseAnimation); pauseAnimation();
Message Log
This is a lesson, not a challenge, the code runs automatically.

But change it! Play with it! Click "Run" to see your changes.

Run
Run and Focus Canvas
Reset
Canvas (your drawing will display here)

Challenge 4

Challenge4example
Challenge 4 Sample Solution

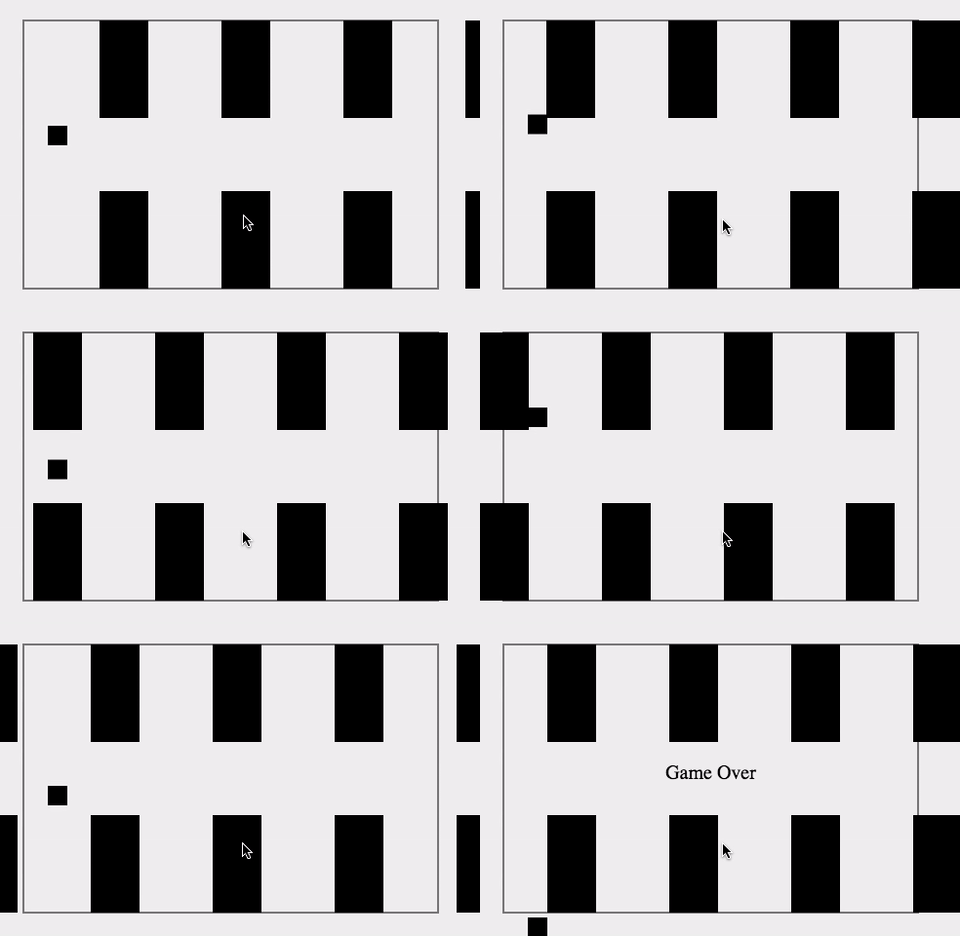
Ok, let's try to algorithmically create our walls so that we can have an infinited number of walls that continuously scroll by.

Eventually we'll need to randomize the spacing of the walls, but for now let's just place them every 125 pixels.

You'll need to create a loop that continuously creates new walls and has the existing walls continuously scroll to the left.

The lesson above provides one example of an algorithm that accomplishes this. It uses a while loop to loop through every pixel on the canvas, checking to see when a pixel, adjusted for distance, is divisible by the spacing (125 pixels):

if (wallX % wall.spacing === 0) {
  ...
}

We have one more challenge for our game, though. We don't want the flappy square to launch right into a wall, so you'll need to change the algorithm from the lesson above so that the "x" position of the first wall is no less than 125 pixels while still not causing walls to vanish too early as the scroll to the left.

In the end your flappy square should behave like the example provided to the right.

Quick Reference: While Loops setInterval() fillRect() Coordinates

Previous Challenge: View your code from Stage 3 Challenge 3 to use on this challenge.

Code Missing: You have not yet entered any code in to the previous challenge: Stage 3 Challenge 3
Stage 3 Challenge 3
Editor (write code below)
var canvas = document.getElementById('flappy_square_stage3_challenge4'); var context = canvas.getContext('2d'); var interval; var gravity = ; var distance = ; // HASH VARIABLES HERE // Remember to store "spacing" in // your wall hash variable function drawBoundary() { } function drawSquare() { } function drawWall(x) { } function drawWalls() { // In here we'll have to create an // algorithm that continuously creates // new walls starting at 125 pixels. } function flap() { } function adjustPosition() { } function checkBoundary() { } function endGame() { context.font = "20px serif"; context.textAlign = 'center'; var xCenter = boundary.width / 2; var yCenter = boundary.height / 2; context.fillText('Game Over', xCenter, yCenter); pauseAnimation(); } function programSteps() { } function runProgram() { interval = } canvas.addEventListener('click', flap); // The following code is provided for you. // It creates an eventListener that listens // for the canvas to come into "focus", which // happens when you click on it. // This allows us to stop and start each individual // animation on this whole page separately. function startAnimation() { runProgram(); } function pauseAnimation() { clearInterval(interval); } canvas.addEventListener('focus', startAnimation); canvas.addEventListener('blur', pauseAnimation); canvas.focus();
Message Log
This is a lesson, not a challenge, the code runs automatically.

But change it! Play with it! Click "Run" to see your changes.

Run
Run and Focus Canvas
Reset
Canvas (your drawing will display here)

A Solution: Here's the code I wrote to complete this challenge. View One Possible Solution

var canvas = document.getElementById('flappy_square_stage3_challenge4'); var context = canvas.getContext('2d'); var interval; var distance = 0; var gravity = 0.5; var boundary = { minX: 25, minY: 25, width: 425, height: 275 }; var square = { x: 25, y: 75, size: 20, yVelocity: 0, jump: -8 }; var wall = { width: 50, height: 100, spacing: 125 }; function drawBoundary() { context.strokeRect(0, 0, boundary.width, boundary.height); } function drawSquare() { context.fillRect(square.x, square.y, square.size, square.size); } function drawWall(x) { context.fillRect(x, 0, wall.width, wall.height); context.fillRect(x, boundary.height - wall.height, wall.width, wall.height); } function drawWalls() { var wallX = distance - wall.width; if (wallX < wall.spacing) { wallX = wall.spacing; } while (wallX < canvas.width + distance + wall.width) { if (wallX % wall.spacing === 0) { drawWall(wallX - distance); } wallX += 1; } } function flap() { square.yVelocity = square.jump; } function adjustPosition() { distance += 2; square.yVelocity += gravity; square.y += square.yVelocity; } function checkBoundary() { if (square.y >= boundary.height) { endGame(); } } function endGame() { context.font = "20px serif"; context.textAlign = 'center'; var xCenter = boundary.width / 2; var yCenter = boundary.height / 2; context.fillText('Game Over', xCenter, yCenter); pauseAnimation(); } function programSteps() { context.clearRect(0, 0, canvas.width, canvas.height); adjustPosition(); context.save(); context.translate(boundary.minX, boundary.minY); drawBoundary(); drawSquare(); drawWalls(); checkBoundary(); context.restore(); } function runProgram() { interval = setInterval(programSteps, 80); } canvas.addEventListener('click', flap); // The following code is provided for you. // It creates an eventListener that listens // for the canvas to come into "focus", which // happens when you click on it. // This allows us to stop and start each individual // animation on this whole page separately. function startAnimation() { runProgram(); } function pauseAnimation() { clearInterval(interval); } canvas.addEventListener('focus', startAnimation); canvas.addEventListener('blur', pauseAnimation); canvas.focus();
 

Lesson: Clearing The Edges

Lesson5visual
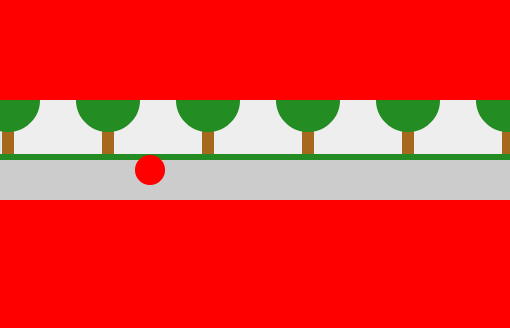
The red areas are erased to designate the 'boundary'.

Since we have a boundary to our game area, it doesn't look great to have any part of our drawing (walls or the flappy square) display outside of the boundary.

Clearing areas can allow you to accomplish this goal. It can also allow you to create complex animations on a single canvas.

In this example we take our ball rolling animation and draw it in the middle of the canvas, clearing the areas above and below it to demonstrate drawing each frame and then erasing parts of it to designate the boundary.

In the image to the right you can see the red areas which are the areas being cleared out in the example below. This code uses the context.clearRect(x, y, width, height) method to clear the area above and the area below:

function clearBoundary() {
  context.clearRect(0, 0, canvas.width, boundary.minY);
  context.clearRect(0, boundary.maxY, canvas.width, canvas.height - boundary.maxY);
}

This clears two rectangles, one from the top left of the screen down to the boundaries minY, and the other from the boundaries maxY to the bottom right of the canvas.

Quick Reference: Coordinates clearRect()

Editor (write code below)
var canvas = document.getElementById('flappy_square_stage3_lesson5'); var context = canvas.getContext('2d'); var interval; var distance = 0; var road = { height: 40 }; var tree = { width: 64, spacing: 75 }; var boundary = { minX: 100, maxX: 400, minY: 100, maxY: 200 }; function drawRoad() { context.save(); context.fillStyle = '#cccccc'; var roadY = boundary.maxY - road.height; context.fillRect(0, roadY, canvas.width, road.height); context.restore(); } function drawGrass() { context.save(); context.fillStyle = '#238d23'; var grassHeight = 6; var grassY = boundary.maxY - road.height - grassHeight; context.fillRect(0, grassY, canvas.width, grassHeight); context.restore(); } function drawTrees() { var treeX = distance - tree.width; while (treeX < canvas.width + distance + tree.width) { if (treeX % tree.spacing === 0) { drawTree(treeX - distance); } treeX += 1; } } function drawTree(centerX) { var bottomY = boundary.maxY - road.height; context.save(); context.translate(centerX, bottomY); context.fillStyle = '#a5681c'; context.fillRect(0, -60, 12, 60); context.beginPath(); context.arc(6, -60, tree.width / 2, 0, Math.PI*2, true); context.closePath(); context.fillStyle = '#238d23'; context.fill(); context.restore(); } function clearBoundary() { context.clearRect(0, 0, canvas.width, boundary.minY); context.clearRect(0, boundary.maxY, canvas.width, canvas.height - boundary.maxY); } function drawBall() { context.save(); context.translate(boundary.minX + 50, boundary.maxY - (road.height / 2) - 10); context.beginPath(); context.arc(0, 0, 15, 0, Math.PI*2, true); context.closePath(); context.fillStyle = 'red'; context.fill(); context.restore(); } function adjustPosition() { distance += 2; } function programSteps() { context.clearRect(0, 0, canvas.width, canvas.height); adjustPosition(); drawRoad(); drawTrees(); drawGrass(); drawBall(); clearBoundary(); } function runProgram() { interval = setInterval(programSteps, 50); } // The following code is provided for you. // It creates an eventListener that listens // for the canvas to come into "focus", which // happens when you click on it. // This allows us to stop and start each individual // animation on this whole page separately. function startAnimation() { runProgram(); } function pauseAnimation() { clearInterval(interval); context.font = "20px serif"; context.textAlign = 'center'; context.fillText('Click anywhere on the canvas to start the animation.', canvas.width / 2, 50); } canvas.addEventListener('focus', startAnimation); canvas.addEventListener('blur', pauseAnimation); pauseAnimation();
Message Log
This is a lesson, not a challenge, the code runs automatically.

But change it! Play with it! Click "Run" to see your changes.

Run
Run and Focus Canvas
Reset
Canvas (your drawing will display here)

Challenge 5

Challenge5example
Challenge 5 Sample Solution

For this challenge we're going to clean up the edges of our game.

Right now the walls appear outside of the boundary and, if the flappy square goes above or below the boundary we still show it.

So we're going to add a method clearBoundary() that will clear the areas outside of the boundary after each frame is drawn.

We're basically drawing our full frame and then erasing everything outside of the boundary. We'll use the context.clearRect(x, y, width, height) to erase everything outside of the boundary we've drawn.

Remember that we're currently translating the origin down to the top left corner of our game's boundary. Since we want to clear the borders outside of the boundary you may want to call context.restore() to reset the origin. Otherwise you'll need to do calculations to determine where to start your context.clearRect(x, y, width, height) call.

In the end your flappy square should behave like the example provided to the right.

Quick Reference: Coordinates clearRect()

Previous Challenge: View your code from Stage 3 Challenge 4 to use on this challenge.

Code Missing: You have not yet entered any code in to the previous challenge: Stage 3 Challenge 4
Stage 3 Challenge 4
Editor (write code below)
var canvas = document.getElementById('flappy_square_stage3_challenge5'); var context = canvas.getContext('2d'); var interval; var gravity = ; var distance = ; // HASH VARIABLE HERE function drawSquare() { } function drawBoundary() { } function drawWall(x) { } function drawWalls() { } function flap() { } function adjustPosition() { } function clearBoundary() { // CODE HERE TO CLEAR ALL AREAS OUTSIDE OF THE BOUNDARY } function checkBoundary() { } function endGame() { context.font = "20px serif"; context.textAlign = 'center'; var xCenter = boundary.width / 2; var yCenter = boundary.height / 2; context.fillText('Game Over', xCenter, yCenter); pauseAnimation(); } function programSteps() { // Don't forget to clear the boundary. } function runProgram() { interval = } canvas.addEventListener('click', flap); // The following code is provided for you. // It creates an eventListener that listens // for the canvas to come into "focus", which // happens when you click on it. // This allows us to stop and start each individual // animation on this whole page separately. function startAnimation() { runProgram(); } function pauseAnimation() { clearInterval(interval); } canvas.addEventListener('focus', startAnimation); canvas.addEventListener('blur', pauseAnimation); canvas.focus();
Message Log
This is a lesson, not a challenge, the code runs automatically.

But change it! Play with it! Click "Run" to see your changes.

Run
Run and Focus Canvas
Reset
Canvas (your drawing will display here)

A Solution: Here's the code I wrote to complete this challenge. View One Possible Solution

var canvas = document.getElementById('flappy_square_stage3_challenge5'); var context = canvas.getContext('2d'); var interval; var distance = 0; var gravity = 0.5; var boundary = { minX: 25, minY: 25, width: 425, height: 275 }; var square = { x: 25, y: 75, size: 20, yVelocity: 0, jump: -8 }; var wall = { width: 50, height: 100, spacing: 125 }; function drawBoundary() { context.strokeRect(0, 0, boundary.width, boundary.height); } function drawSquare() { context.fillRect(square.x, square.y, square.size, square.size); } function drawWall(x) { context.fillRect(x, 0, wall.width, wall.height); context.fillRect(x, boundary.height - wall.height, wall.width, wall.height); } function drawWalls() { var wallX = distance - wall.width; if (wallX < wall.spacing) { wallX = wall.spacing; } while (wallX < canvas.width + distance + wall.width) { if (wallX % wall.spacing === 0) { drawWall(wallX - distance); } wallX += 1; } } function flap() { square.yVelocity = square.jump; } function adjustPosition() { distance += 2; square.yVelocity += gravity; square.y += square.yVelocity; } function clearBoundary() { var maxX = boundary.minX + boundary.width; var maxY = boundary.minY + boundary.height; context.clearRect(0, 0, canvas.width, boundary.minY); context.clearRect(maxX, 0, canvas.width - maxX, canvas.height); context.clearRect(0, maxY, canvas.width, canvas.height - maxY); context.clearRect(0, 0, boundary.minX, canvas.height); } function checkBoundary() { if (square.y >= boundary.height) { endGame(); } } function endGame() { context.font = "20px serif"; context.textAlign = 'center'; var xCenter = boundary.width / 2; var yCenter = boundary.height / 2; context.fillText('Game Over', xCenter, yCenter); pauseAnimation(); } function programSteps() { context.clearRect(0, 0, canvas.width, canvas.height); adjustPosition(); context.save(); context.translate(boundary.minX, boundary.minY); drawBoundary(); drawSquare(); drawWalls(); checkBoundary(); context.restore(); clearBoundary(); } function runProgram() { interval = setInterval(programSteps, 80); } canvas.addEventListener('click', flap); // The following code is provided for you. // It creates an eventListener that listens // for the canvas to come into "focus", which // happens when you click on it. // This allows us to stop and start each individual // animation on this whole page separately. function startAnimation() { runProgram(); } function pauseAnimation() { clearInterval(interval); } canvas.addEventListener('focus', startAnimation); canvas.addEventListener('blur', pauseAnimation); canvas.focus();
Ready for the next lesson?

Next up, the "Stage: 4" lesson >